
If you were running a business without a website before Covid-19, it is almost essential to create one now. There is not a single business that couldn’t benefit from their own website to present their services or products online. Aside from businesses, even individuals may want to consider having a website to showcase their skills and more.
In the past creating a website was quite challenging and very expensive. However, in 2020 you can create a website fairly easy and in some cases even for free.
Since having a website is basically no longer a choice, we decided to present you with options on how to create a website free of cost. This article is mainly for those of you who want to minimize the cost. We performed extensive research to present you with various free website alternatives and additional helpful tips that will get you on the right track.
Are you ready to dig deeper and learn how to create a website free of cost? Let’s do this.
The Basics of a Website
The basics of getting a website include:
- Choosing the type of website you want (sales funnel, online store, blog, forum, …)
- Keep in mind that if you are looking for an eCommerce-ready site, free options are very limited
- Choosing between getting your own domain (almost never free; typically between $5-$15/year) or getting a website builder’s subdomain (these are normally free)
- Choosing a website builder (simplicity, limited to website builders options (recommended for most small businesses and individuals)) or choosing a web designer (expensive but offers you complete freedom to get the kind of site you want (recommended only for huge business or other unique cases))
- Creating your website or having someone else do it for you – the process varies depending on the above choices
- Adding basic content (about, privacy policy, and contact is still a must-have),
- Test it
- Launch it
What is a website builder?
Let’s start with the basics, ok? As mentioned above, in the past you needed an expert who knew web coding and had special skills to create a website. Now, all you need is a website builder.
A website builder is typically a cloud-based platform that provides you with all the tools needed to create and manage your website. It comes with some sort of back-office or dashboard, from where you manage all aspects of your website. In many cases website builders offer you drag and drop features or other types of no-coding setup and editing.
Using a proper website builder, all of the above can be done fast and in some cases completely for free.
To learn how to create a website free of cost, continue to the next section, where we will go into detail and cover 10 website builders that enable you to create your website for free.
10 Best Website Builders For Creating A Free Website
Below is a list of 10 best free website builders. How to create a website free of cost with each of them varies slightly. Some offer very limited functionality on their free option, while others give you a lot more for free.
That said, each of the website builders enables you to start for free, however, with most of them, you will be facing some cost as you grow your business or if you want more advanced features.
To help you decide how to create a website free of cost using a website builder of your choice, have a look at our overviews of the 10 best website builders for creating a free website.
How to create a website free of cost using Weebly
Weebly is a well-established website builder that has been around for over 10 years. It enables you to create basically all types of websites, including blogs and online stores. Their builder includes a simple drag-and-drop solution, which makes it suitable for everyone.
How to create a website free of cost using Weebly – the steps:
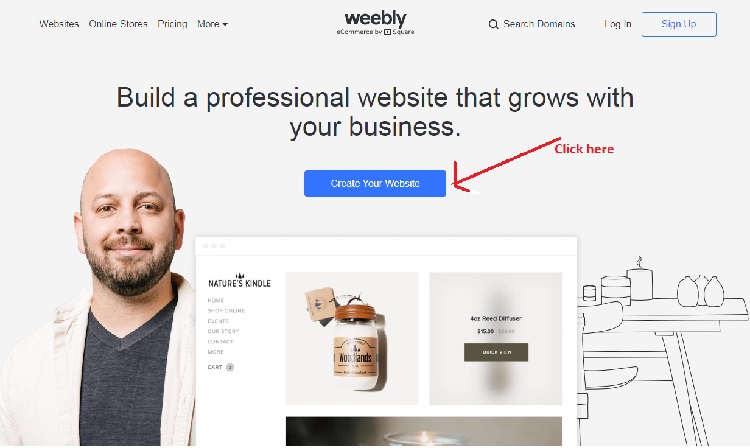
- Visit Weebly’s official website
- Click the “Create Your Website” button, the “Get Started” button or the “Sign Up” button
- Enter your information and click Continue (the Sign-up process)
- Answer the ‘What kind of website would you like to create?’ question. You get two options: ‘I just need a website’ or ‘I need a website with an online store.’ Do not overthink this step since you can add a store later on.
- Select a theme – There are over 50 themes to choose from and they are all free. You can browse the themes by categories, which include Business, Portfolio, Personal, Blog, and Other. These can be changed at any time, so again, do not overthink it (make use of the preview option). Once you have found the theme you like, click the ‘Start Editing’ button in the top right corner.
- Choose your domain – Here you have two options, you can either go with your own domain (which will cost you typically around $14 – $20 per year (www.yourowndomain.com) and you will need a paid plan) or go with Weebly’s free subdomain option, which will include ‘weebly.com’ within the URL (www.thenameofyourwebsite.WEEBLY.com). Weebly enables you to register your own domain via their platform, however, keep in mind that you can get cheaper domain names elsewhere, however, that will be slightly more complicated.
- Design your Weebly website (use the help offered within their builder or use YouTube tutorials for additional help). Below are the main aspects of designing your Weebly website:
- Text boxes editing – Weebly offer a ‘What-you-see-is-what-you-get’ builder, which means that all your edits will be visible for you in the preview. Click and edit, drag, and drop media, all without any coding need. To change any text, simply click the text box and type in what you want. Use the text editing bar to make the font Bold or Italic.
- Adding elements – Weebly offers the ‘Element Menu’ on the left side. You simply drag and drop the icon of the media on the page to add the element. This includes adding text ‘boxes’, videos, buttons, images, and other elements. (Note: Elements with a lightning bolt cannot be used on a free plan.)
- Adding pages – Even if you decide to have a single-page site, you will need to add several technical pages, including ‘About’, ‘Privacy Policy’, and ‘Contact Us’. To do so, go to the ‘Pages’ tab in your side menu and click the ‘+’. This will cause a drop-down menu to appear. It will offer you various types of pages. Click the one that best suits your needs, name it, and Weebly will automatically load the page for you with content fillers that you then replace with your own as described in previous steps. Don’t forget to click ‘Done’ (this will save the page). Then return to the ‘Build’ menu tab to edit the page.
- Changing the Colors – For each theme, you get to set your own color scheme to make it even more unique. Simply head to the Theme section in the dashboard. The color options vary from theme to theme. For some, you can only choose between light and dark, while for others you get to select among many colors.
- Your Own Layouts – To make your site even more unique, you may want to consider adding your own layouts. This refers to adding new sections to the pages. Above, you’ve learned to add elements to sections, now you know that you can add entire sections (which is also an element). The ‘Section’ element is on top of the sidebar. Simply click it and drag it to the areas of your page where you want to add it and drop it there. You will then get to select between several options (Contact, Menu, Featured, Team, and Gallery). Select one. A list of different layouts will be given. Choose the one that you like best by clicking it. Remember to click Save in the popup box.
- Sections Deleting – If you want to delete a section or an element, simply click on it and look for the blue cross that appears in the top right corner. Click it. This will turn the box red and give you the option to delete it. Click ‘Delete’ to complete the process.
- Add apps – by clicking the ‘Apps’ option in the dashboard, you will be taken to the Weebly App Center. The apps are intended to help you boost your website. They are not essential, however, recommended. Search for the apps you want and then install them. It is very simple.
- Add a store – If you need a store, you can add it here. While in ‘Editor’ select the ‘Products’ element (if you haven’t chosen the store in step 4, Weebly will redirect you to store setup). (If you don’t want a store, you can skip this step.)
- Choose a price plan – Keep in mind that the free plan comes with some limitations, however, it may be all you need to start.
- Publish your Weebly website
Weebly Free Plan:
Weebly’s free plan comes with:
- a free SSL certificate
- Weebly branded domain name (t.i. subdomain)
- Search Engine Optimization (SEO)
- Lead Capture and Contact Forms
- 500MB of free webspace
- Support:
- Community Forum
- Chat & Emil Support
Weebly Paid Plans:
Weebly offers several paid plans. Three paid plans for website from €5/mo to €20/mo (paid annually) and for online stores from €10/mo to €30/mo (paid annually).
The higher the price, the more features are included.
 Fully hosted website builder
- Free SSL certificate
- Simple and easy to use drag and drop builder
- Live page editor
- 500MB of free webspace
 Very noticeable Weebly branded ads on free plan – footer ad is extremely visible
- Weebly branded domain on the free plan
- Limited features or plugins to Weebly builder
- There is no free plan if you want to connect your own domain
How to create a website free of cost using WIX
Wix is another very popular website builder. It prides on offering an extremely easy to use the platform and offer a lot of templates to get beginners started. It also comes with simple drag and drops functionality, which is very intuitive and user friendly. Wix is currently the biggest website builder and has the most users. When considering creating a paid website, it is one of the best options, however, if you are looking for a free site, it may not be for everyone.
How to create a website free of cost using WIX – the steps:
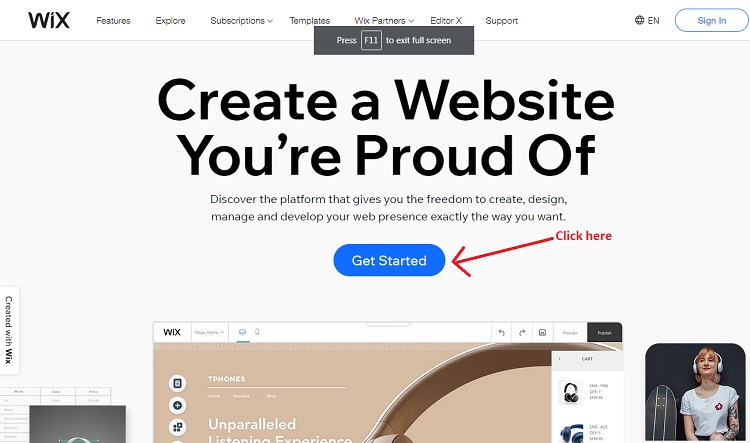
- Visit Wix’s official website and click the “Get Started” button
- Sign up (create your account) for a free website builder.
- Answer the questions (this helps determine the kind of website you need)
- Choose a template – There are many templates to choose from. You can search by category to make the selection faster. You can also go with a black template and create yours from scratch. As you select the template you like, click the “edit” to continue. Click any of the elements you see and use the side navigation bar to determine what actions to take.
- Edit your site – This part will be done with Wix editor. Wix also offers you a ‘What-you-see-is-what-you-get’ editor and drag-and-drop options. All visible elements can be changed by simply clicking on the element. There are two sidebars in Wix editor. The one on the left side is adding elements, while the one on the right is to manipulate those elements.
- Updating Text – First, you will want to update your company, portfolio, or blog details. Just click on the text you want to update and rewrite the content. Change the font size, use italics, and bold adjustment if you want.
- Updating Images – If your template comes with images, those can be changed. Click the image you want to change it. You can use images saved on your computer or use Wix’s free images.
- Personalizing the Background – The templates’ background image can also be changed. Find a ‘Background’ button in the sidebar, click it and change the image. You can also add a video to your background.
- Adding Pages – To add a page to your site, click the down arrow next to your current page at the top of the editor, then click “Manage Pages.” From the menu that appears, you’ll be able to add pages and customize them to serve different purposes.
- Add Apps – this is completely optional. If you want your site to do some extra stuff, you will need to consider adding apps. To access the Wix App Market, you will need to click the corresponding icon in the left sidebar. Each app has a thumbnail preview, with a ‘Free’ or ‘Premium’ price option (or both). Choose the apps that you need.
- Set Up a Blog (optional) – If you want to add a blog to your site, just click the “pen” icon in the left sidebar.
- Add an online store (optional) – click the “+” icon in the left-hand menu to view a list of add-ons for your site. From this list, select “Store,” and you’ll get to the “Add Store Elements” menu.
- Mobile – Make sure to click the “mobile phone” icon (“Edit your site for mobile.”) to preview how your site will look on smartphones. If any adjustments are needed, do so.
- Choose Your Domain Name – If you want to stay on a free plan, you will need to go with a Wix subdomain option (www.yourname.wixsite/yoursite). This is a good option for beginners, however, if you want a professional site, you will want your own domain, which means also an upgraded plan.
- Publish your website and go live. Start building your professional online presence.
- Drive traffic to your site. Use advanced SEO tools and integrated marketing solutions.
WIX Free Plan:
Wix has a free plan which is not time-limited – you can use it for free, forever. There are, of course, certain limitations compared to the premium plans.
- a free SSL certificate,
- Wix branded domain name (t.i. subdomain)
- Search Engine Optimization (SEO)
- 500MB free webspace
Wix Paid Plans:
Wix offers several paid plans. Four paid plans for websites from $14/mo to $39/mo and for online stores from $23/mo to $49/mo (they also have a tailored solution for enterprise).
The higher the price, the more features are included.
- Fully hosted solution
- Free SSL certificate
- Loads of beautiful templates
- Full SEO customization
- 500MB free webspace
- No page limit
- Drag and drop functionality
- On desktop computers, they place a pretty visible sticky ad at the top of your website on a free plan (i.e. it will stay even when you start scrolling the page)
- Using your own domain will force you to take on a Combo plan, which goes for $14/mo
- There is no free plan if you want to connect your own domain
- Very long free URL (their subdomain)
- Separate subscription required for an email account
How to create a website free of cost using WordPress
Let’s start by getting something clear (this is a common confusion); WordPress has two variations – WordPress.org is a self-hosted version that is completely free but it requires you to source your own hosting and domain name. WordPress.com includes web hosting and is a paid platform, however, it also offers a free plan, which is quite limited.
If you have decent technical skills, WordPress.org can be a good free plan choice, but if you do not want to deal with domain and hosting management, then WordPress.com will be a better choice for you.
How to create a website free of cost using WordPress.com – the steps:
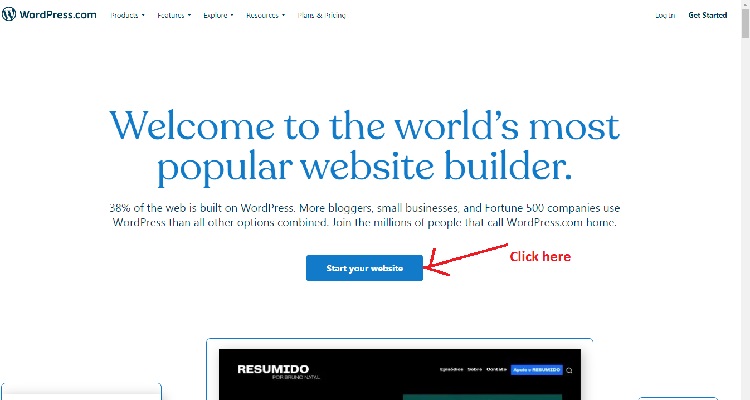
- Visit WordPress.com official website (or go with the self-hosted WordPress.org option (this will include a few additional steps: hosting arrangments and WordPress installation)
- Click the “Start your website” button
- Enter your information and click the “Create your account” button or Continue with Google or Apple
- Select the type of plan
- Use their builder to create your website (use YouTube ‘How to video’ to help you with the setups):
- Select your theme – WordPress offers a lot of free and paid theme options. In your WordPress dashboard, go to Appearance > Themes > ‘Add New.’ On the next screen, you will able to search from 4,492 free WordPress themes that are available in the official WordPress.org themes directory. As you select a theme, you need to install it. Click the ‘Install’ button.
- Add content to your site – in the dashboard, click Post or Pages and then Add new. Then add the title in the top box and content in the larger box below. You can save a draft or publish the content using the navigation buttons on the right side.
- Customizing and Tweaking – there are many settings that the WordPress dashboard offers you to customize. Start by going to Settings > General to set up the basics. Then o to Settings > Reading to set up a static front page. Some themes will also have additional options, which are then accessed via ‘Theme Options’ in the sidebar. Also, set the Comments settings; go to Settings > Discussions. You also want to create navigation menus; Appearance > Menus, where you will be able to add existing pages to your menu.
- Adding Plugins – It is recommended to keep the number of plugins used as low as possible, however, there are some plugins you want to consider adding. This will enable you to add forms, control SEO settings, improve security. If you will want to have an online store, this too will be done by installing the right kind of plugin(s).
WordPress.com Free Plan:
WordPress.com free plan is quite limiting, it includes the following:
- Jetpack Essential Features
- Pre‑Installed SSL Certificate
- 3GB storage space
- Dozens of Free Themes
WordPress.com Paid Plans:
WordPress.com offers four paid plans. Paid plans run from $4/mo (for Personal) to $45/mo (for eCommerce). As normally, the higher the price, the more features are included.
- Loads of additional plugins that can be installed to customize your site (many plugins are free as well)
- org is completely free and gives you full control
- Has its own portfolio of themes and templates
- Most popular CMS platform
- org requires own hosting, domain, and management
- Can be difficult to get started with
- Not a drag and drop builder (however, there are plugging that can turn it into grad and drop builder)
- Keep your own website backups
How to create a website free of cost using Site123
Site123 focuses on users that want to get up and running fast. It is great for business owners that want to set up e-commerce sites, blogs, or/and landing pages.
Site123 stands out with the fact that is not a drag and drop base builder. This makes it perhaps slightly less intuitive to use, however, if you are one of those who are confused by the drag and drop features, you will most like be pleased with the Site123 builder.
How to create a website free of cost using Site123 – the steps:
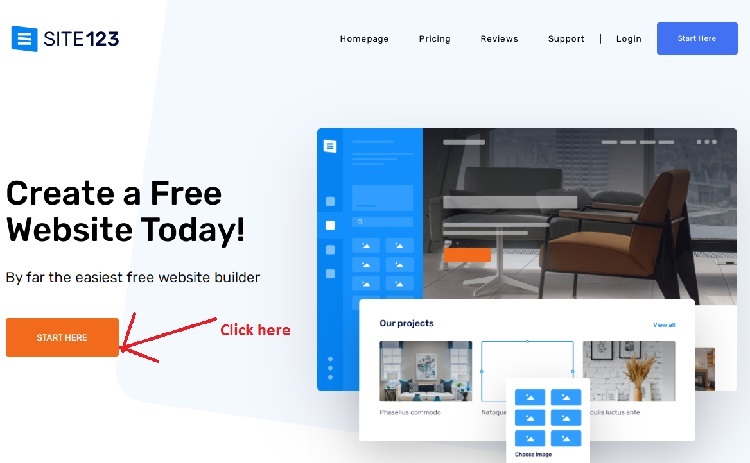
- Visit Site123’s official website
- Click the “Start here” button
- Complete the 3-step sign up process, starting by choosing the type of website, entering your business/site name, and finally entering your information. To complete the process click the “Start my website” button or Sign-up with Facebook or Google
- Select the type of plan that suits you
- Choose the right website type for you – They offer many categories and even more subcategories including business, restaurants, events, and many more. There are hundreds of website types on all kinds of subjects. Click the corresponding category, which will determine website layout and structure.
- Use their builder to create your website
- The Essential Features:
- Add & Edit Pages – Quickly add and edit every type of page you need. Every type of page can be added to any website type and then edited.
- Arrange your Pages – Sort your pages to appear in any order and give each page the name you want for it. All changes are reflected in the editor in real-time.
- The Essential Features:
- Upload Images & Video – Upload your own images and videos to multiple page types. Not have all the content you need? Browse through our free media library, filled with loads of content. Add filters to any image and style everything the way you want as you learn how to create a website.
- Use their design features – Create beautiful galleries of videos and images, enhance your content, and customize your site while it adjusts to be completely responsive on all mobile devices.
- Choose Colors & Fonts – Pick from hundreds of web fonts that fit your websites. Choose from dozens of color palettes samples or customize all of your colors manually.
- Add Your Personal Content:
- Homepage – The first thing most people will see on your website is your homepage. This means that the text, images, or video should clearly show who you are and what your website is all about. If you are trying to sell something, it also helps to have a call for action – buy this, start here, etc. to guide viewers to what you want them to do.
- About Page – This is where to share your story and tell about your website and experiences. Make sure that your message here is suited to your audience and to your company’s broader culture. Letting people know about who you are and what you are all about can assist in making new customers feel comfortable while learning about your company or organization.
- Page Types – While you create your website, use the many useful page types available to you! There are dozens of great choices – restaurants, schedule booking, services, events, online stores, among many others. These pages are specifically designed to handle the task you are working on. Take advantage of these pages as you create your free website.
- Social Media & Contact Us:
- SITE123 Contact Form – The Contact Us page is designed so your visitors can message you and provide information to your website.
- Social Media Implementation – SITE123 allows you to add social media buttons to your header and footer which link to your respective social media accounts.
- Mailing List – SITE123 allows users to easily sign up to be on your mailing list. Everyone who signs up with their email address on your mailing list can be sent newsletters, promotions, updates, and any other messages to their email accounts.
- Manage Your Website:
- Blogging (optional)
- Online Stores (optional)
- Schedule Services (optional)
- Apps & Plugins – The SITE123 App Market has dozens of powerful apps and plugins that you can integrate into your website.
- Domain:
- Set Unique Domains
- Search New Domains
- Have your domain connected for you
- Redirect Domains
- Publish Your Website
Site123 Free Plan:
Site123 offers a free plan. There are, of course, certain limitations compared to the premium plans, especially when it comes to eCommerce.
- 500MB storage
- 1GB bandwidth
- Subdomain
Site123 Paid Plans:
Site123 premium plans as well. Those feature a 14-day money-back guarantee. Their most popular paid Premium plan goes at $12.80/month and includes:
- Free Domain for 1 year
- 10GB storage
- 5GB bandwidth
- Remove SITE123 floating tag
- Connect Your Domain
- E-commerce
- Create one-page or multi-page websites
- Good selection of plugins
- It is easy to work with
- Responsive templates
- The site includes SSL
- Full access to SEO settings
- The editor could be better
- The content is edited in a separate window
- To achieve relatively basic things you need more clicks than with drag and drop editors
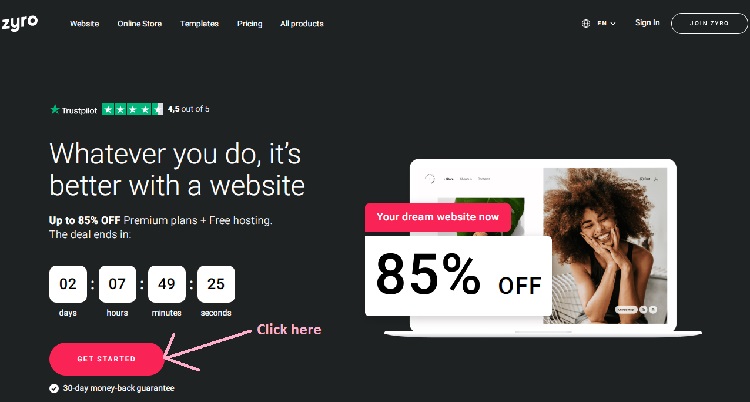
How to create a website free of cost using ZYRO
ZYRO is free only for 30 days! However, they offer one of the most affordable paid plans. Zyro is an easy solution for your web building projects. It focuses on providing users with a clean and smooth interface, with many easy-to-use tools.
Zyro comes with AI-based tools, which helps with generating content and even predicting the behavior of your site’s visitors.
How to create a website free of cost using ZYRO – the steps:
- Visit Zyro official website
- Click the “Start here” button
- Complete the 3-step sign up process, starting by choosing the type of website, entering your business/site name, and finally entering your information. To complete the process click the “Start my website” button or Sign-up with Facebook or Google
- Choose a Template
- Modify Your Template
- Add Elements – To add an element to your template, click the ‘Add elements’. Decide which element you want. Next, left-click on it and while holding your mouse button down, drag it over onto your template. You’ll notice the grid system.
- Using the Grid System – The blocks you see in the grid serve as basic guidelines to let you see the permissible spots where you can place your elements. Any placements or resizing of elements need to follow the basic sizes of each square in the grid system.
- Editing Elements – Click on the element to highlight it with a blue outline. Then you can either drag it to move it, resize it, or choose to edit it.
- Working With Sections – At the bottom of your main page, you have an option to ‘add section’. Sections are what separate your pages in Zyro. Using sections helps improve the UX and use your website navigation menu properly. There are pre-built sections you can use that match your template.
- Check for Mobile Friendliness – Click the mobile phone icon to see if all is displayed smoothly on smartphones.
- Zyro’s AI tools – This will help you choose the right CTA buttons
- Publish your site
Zyro Free Plan:
As mentioned, Zyro does not offer a permanent free plan, however, the first 30 days are for free.
Zyro Paid Plans:
Zyro offers four plans plus customized plans for advanced eCommerce users. Their pricing is very affordable, as it currently starts as little as $3.19/mo. Their most expensive plan (eCommerce+) currently goes for only #13.99/month.
- A simple and intuitive user interface enables you to build a website in a few hours
- SEO-friendly – ensuring faster website loading speed compared to other website builders
- Includes AI-driven marketing features, such as a Slogan Generator, Logo Builder, and Business Name Generator
- Includes AI Writer and AI Heatmap tools
- 24/7 customer support
- 9% uptime guarantee
- Their AI content writer is only really suitable for the English language
- Some of the features are quite basic and limited when compared to the competitors
How to create a website free of cost using Strikingly
Strikingly mainly focuses on building sing page sites. This sounds perhaps too limited, however, single-page websites are very popular these days. Of course, they may not be suitable for all sorts of purposes. So, if you are looking for simplicity, Strikingly may be the right choice for you. They offer a solid number of templates, yet noticeably less than some leading website builders. It also includes drag and drops features, which makes it highly suitable for complete beginners.
How to create a website free of cost using Strikingly – the steps:
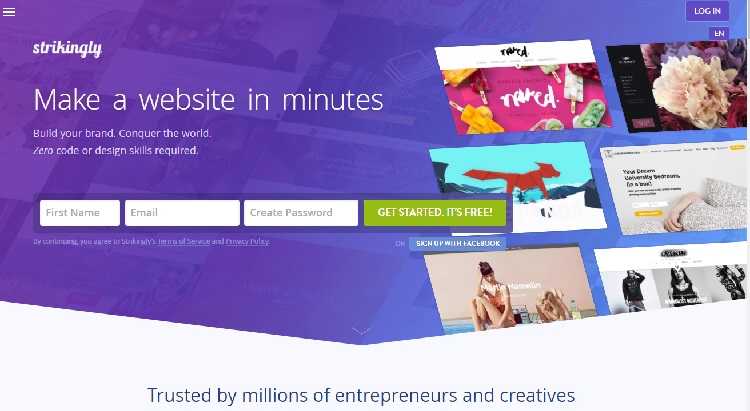
- Visit the Strikingly official website
- Enter your first name, email address, create a password, and click the “GET STARTED. IT’S FREE” button.
- Choose a template
- Edit design – The Editor Panel along the left doesn’t offer page elements as most other site building services do. Within a section, you can only add elements dictated by the theme. Each section defines allowable element types and their exact design. Some sections offer a ‘Change Layout’ button, which gives you additional options.
- Add and remove sections – There are about 20 section types, depending on which template you chose at the outset. These include content in columns or rows, social feeds, blogs, galleries, and forms.
- Background change and font size – You can change a template’s background colors and you get a large font selection, after tapping the tool panel’s Styles button.
- Additional adjustments – Newer templates allow for greater customization, including transparency, padding, and width.
- Settings – The ‘Settings’ button offers options such as site title, domain name, descriptions for SEO, navigation, and privacy.
- Publish your site – Use the ‘Publish’ button when you are pleased with your edits
- Select your plan and start building your new website.
Strikingly Free Plan:
Strikingly’s free plan comes with:
- Unlimited Free Sites
- com Domain (t.i. subdomain)
- 5 GB Monthly Bandwidth
- 500 MB total storage per site
- Simple Store – 1 product per site
- Invite Collaborators
- 24/7 Support
Strikingly Paid Plans:
Strikingly offers three paid plans. When paid annually, the most affordable one starts at $8/month, the second option goes at $16/month, and their VIP plan runs for $49/month.
The higher the price, the more features are included.
- Professional looking sites built fast
- Mobile optimized themes
- Great value for money
- No coding or design skills required
- Generous rewards program
- Their free plan is a slightly limited
- Number of themes could be greater
- Making an online store is not possible with a free plan
- Only Pro plan lets you create multipage sites.
How to create a website free of cost using Ucraft
The Ucraft website builder is a block-based builder. You simply stack blocks on top of each other.
They are limited to 35 blocks, which is relatively limiting for those who want to create a complex website. However, those blocks are completely customizable. Within each block, there are elements that you can add or remove, which enables you to be creative and create unique websites. In addition, you can also create your own block from scratch.
Ucraft has its own eCommerce engine, which makes it very powerful in this aspect. However, it may slightly longer to get up and running compared to other options.
How to create a website free of cost using Ucraft – the steps:
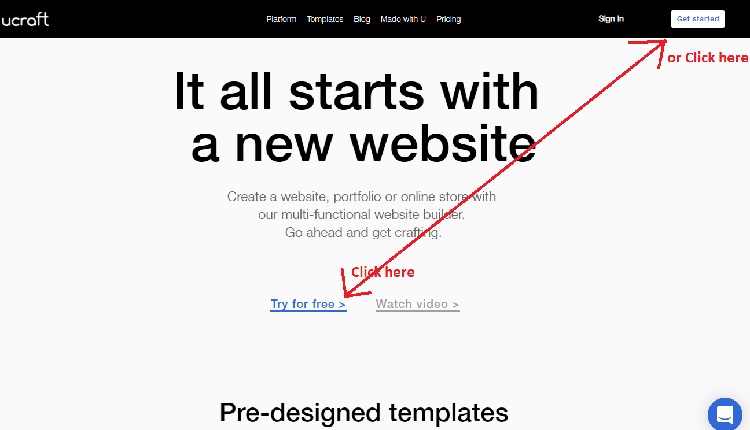
- Visit Ucraft official website
- Click “Try for free”.
- Complete the 4-step process:
- Choose template
- Choose subdomain
- Sign Up
- Edit your template (Drag and drop non-coder editing)
- Use the Left Panel – You will find everything you need on the left-hand side of our free website builder. Click through their full set of features to edit almost anything on your site: from CTA buttons to subscription elements and maps. Explore their wide range of apps to further enhance your website, add new pages, set up analytics, connect a domain, and much more.
- Blocks – Blocks are used to build a page using pre-designed layouts.
- Elements – Enrich your site with practical elements.
- Use the Left Panel – You will find everything you need on the left-hand side of our free website builder. Click through their full set of features to edit almost anything on your site: from CTA buttons to subscription elements and maps. Explore their wide range of apps to further enhance your website, add new pages, set up analytics, connect a domain, and much more.
- Colors – Choose vibrant colors to enhance the design
- Effects – Add eye-catching animations to your site.
Ucraft Free Plan:
Ucraft’s free plan comes with:
- Unlimited Free Sites
- They let you connect your domain
- SSL Security
- 15 pages limit
- Basic Elements
- Unlimited Bandwidth
- Visibility Settings
- Google Analytics
- Password Protected Pages
- 24/7 Support
Ucraft Paid Plans:
Ucraft offers three paid plans and they all come with a 14-day free trial and a free domain (for a year). When paid annually, the most affordable one starts at $10/month, the second option goes at $21/month, and their Unlimited plan runs for $69/month.
The higher the price, the more features are included.
- Highly customizable website builder
- Powerful eCommerce features
- Impressive customer support through live chat
- No site backups offered
- Edits don’t come with an undo option
- An online store can’t be created with a free plan
- Not suitable for larger and highly complex sites
How to create a website free of cost using Jimdo
Jimdo is mainly focused on users looking to build eCommerce stores. They really focus on making every step super simple.
One of the best things about Jimdo is that you can be up and running and selling products within minutes. Their templates could be better, although there are many of them and some are very well.
How to create a website free of cost using Jimdo – the steps:
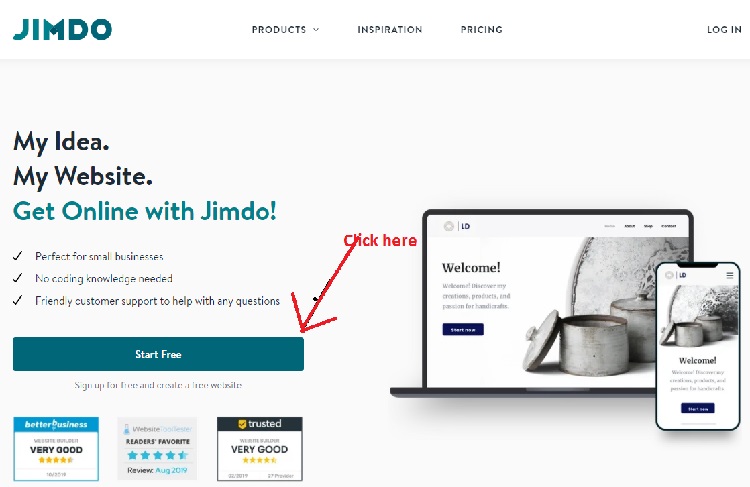
- Visit Jimdo official website
- Click the “Start Free” button.
- Sign in and complete the process (select the type of website, template, and customize)
- Pick a Template – There are about 15 templates to choose from at this stage (you get more options later on). All templates are mobile responsive. You can also start with a blank template.
- Select a plan – Pick the one that suits your website’s needs. If you are looking for a free site, then go with the free plan. (If you choose a paid plan, you’ll be taken through the payment process.)
- Domain Selection – Check for a domain name availability with Jimdo’s search tool. You can also import your custom domain provided it is supported by Jimdo. Connect to your domain and your site is ready.
- Edit Your Jimdo Website – using your website’s dashboard, you will be able to customize your site as much as you like. Use the menu tab at the top left corner to access more Jimdo features.
- Design Tab – design the look and feel of your website
- Additional templates
- Style – you can edit your site globally or use the “style by element” button to design each element on your site individually
- Design Tab – design the look and feel of your website
- Background – Change the background color of your website pages or click on the “+” tab to add a new photo, slideshow, video, or background color catalog.
- Store Tab – use it to add an online store to your website
- Blog Tab – use this tab if you want to add a blog to your site
- SEO Tab – Here you get to edit your page title and page description for your homepage. And you can also edit your website title. In this tab, you also get to connect your site to Google Analytics, Facebook Analytics, and access URL Redirects.
- Domains & Email Tab – Only for Jimdo Pro and Jimdo business – to customize your domain or transfer a domain for free
- Settings Tab:
- General – To edit different elements
- Language
- Footer
- Favicon
- About Page
- Scroll-To-Top button
- Privacy & Security
- Questions Tab – Here is where you find help if needed
- Add Elements – Add elements that you want, edit the content and use the above-presented tabs to edit the design and other details
- Publish your website
Jimdo Free Plan:
Jimdo’s free plan is called ‘Play’, which tells you a lot. At least they are honest about it. Their free plan is suitable for those looking to start with some basic information put on their website. It includes:
- All basic features
- .jimdosite.com subdomain
- 500 MB storage
- 2 GB Bandwith
- HTTPS security
Jimdo Paid Plans:
Jimdo offers three paid plans for websites ranging from $9/month to $39/mo (billed annually) and three plans for an online store, ranging from $15/mo to $39/mo (billed annually).
The higher the price, the more features are included.
- The quickest way to get an eCommerce store up and running
- Highly affordable pricing
- Access to the code
- Powerful SEO elements
- Templates tend to feel a bit dated
- The payment system is probably not the best for US sellers
- An online store cannot be created using a free plan
How to create a website free of cost using Carrd
Carrd was launched in 2016, which makes it relatively new. Since single-page websites are extremely popular these days, Carrd decided to fully focus on that. This one-page builder is one of the best options for those of you looking for simplicity.
They offer 54 templates, 14 of which are reserved for pro users. The templates look very inspiring and sleek.
The website is put together using elements, which makes everything feels very natural. Some of the elements include timers, forms, and galleries, which may be something of your interest.
How to create a website free of cost using Carrd – the steps:
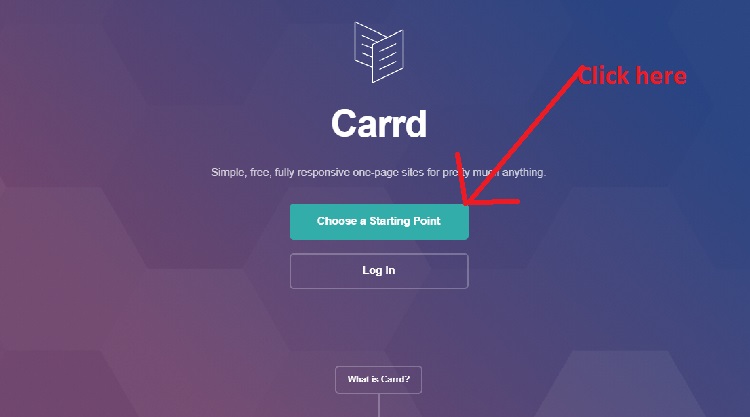
- Visit Carrd official website
- Click the “Choose a Starting Point” button.
- Select a template that you like (if you want to use their free plan, stay away from the ones marked with “PRO”)
- Start editing your theme and adding content
- Standard Elements – manage the appearance of each of these elements by changing the color (add in your own HEX codes), size, width, spacing, shape, angle, and even small details such as the corner radius (options may be limited for some themes)
- Background
- Text
- Standard Elements – manage the appearance of each of these elements by changing the color (add in your own HEX codes), size, width, spacing, shape, angle, and even small details such as the corner radius (options may be limited for some themes)
- Images
- Buttons
- Icons
When you click on an element, the toolbar on the left pops up. It allows you to edit the Contents and Appearance of the element.
- Placement & Animations – With Carrd you get to rearrange the placement of the content as well as animate it.
- Connect to your platforms –use buttons, images, and icons to link to other parts of the site, your social media accounts, etc.
- Customize your theme – by selecting the “+” sign in the toolbar you get to add additional elements to fully customize your website
- When you decide to save or publish your site, you will be prompted to enter your info (sign up)
- Press the SAVE button on the toolbar so that you can publish your finished website
- Publishing your website to a domain with the extension ‘carrd.co’ is completely FREE.
Carrd Free Plan:
Carrd free plan offers all the basics you need. Of course, it comes with their branding but it lets you build up to three sites per account and use all of Carrd’s core features, which is quite impressive.
Carrd Paid Plans:
Carrd offers three paid plans for websites ranging from $9/year (3 sites) to $49/year (25 sites).
The higher the price, the more features are included.
They also offer a 7-day free trial.
- Highly user-friendly and very simple to use
- Extremely affordable upgrades
- Professional looking sites fast
- 54 responsive templates to choose from
- Relatively new in the marketplace
- Email support only
- Limited to one-page sites
- Major down site: You can’t create an online store
How to create a website free of cost using Comms.dev
Comms.dev is one of the most affordable website builders on the market. They let anyone start for free, even more, you get to make business for free. Their free plan applies for up to 50 orders per year, which makes it one of the most affordable eCommerce options. You literally pay nothing until you are making sales.
Their builder is user friendly, though it is not a drag-and-drop featured. Their platform is all-in-one, which means that it also includes advanced marketing features, including email auto-responder, forms, and analytical tools.
How to create a website free of cost using Comms.dev – the steps:
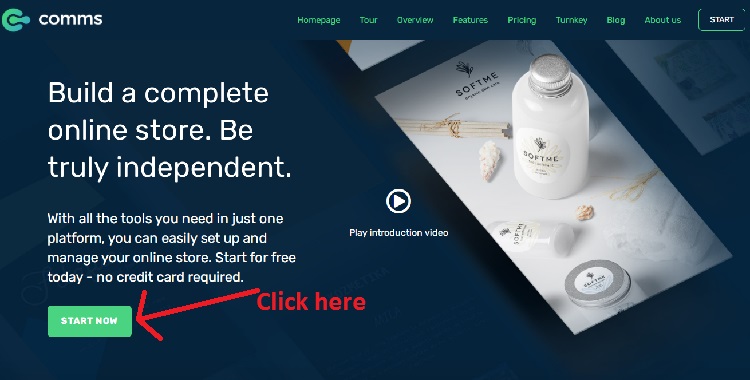
- Visit Comms.dev official website
- Click the “Start now” button.
- Fill out the form and click the “Let’s start button.”
- Start building your online business using Comms.dev back office
- Main dashboard is used to set up your business info – Just start at the top and complete all the steps for each section
- Listings – This where you create and manage your listings. Click the “Add New” to add a new listing.
- Order – here you manage your orders
- Payments – View and manage your payments
- Marketing – Manage campaigns, Email templates, Newsletters, etc.
- CMS – This where you can see the CMS records for all your content, menu items, etc.
- CRM – This is where you can see all your sent emails and users, import FB leads, and more.
- Setting – here you set up the payments methods, extensions, Google Recaptcha, general settings, Domain settings, currency settings, and more
- Storefront – To manage the contact and theme appearance. The navigation bar appears on the right side as you click on each icon in the bottom right corner.
- Dashboard icon – takes you to the above-presented dashboard
- The Settings icon – to edit general style, colors, typography, logos and favicons, menus, and access library
- The Pages icon – Here you create a new page, clone an existing one, copy it, delete it, etc.
- The Edit icon – Click this icon to edit the content on the page; you can also just double click on the element you want to edit.
Comms.dev Free Plan:
Comms.dev free plan is definitely the best free option currently available on the market. Of course, you have to cover the expense of the domain registry (up to $15) and hosting (starting at $2/mo), but there is no fee from Comms.dev. Moreover, they charge no commission on sales. Comms.dev is without a doubt the best option for businesses starting fresh online and looking to cut down expenses.
The free plan includes up to 1000 form responses (per year) and up to 5000 emails sent. They do not mark your free page with their branding, which is really amazing.
Comms.dev Paid Plans:
Comms.dev offers a PRO plan, which covers up to 1000 orders per year, up to 10,000 form responses per year, and up to 200,000 emails sent per year. Their PRO plan is only €20/month.
If you are a larger business, they offer custom solutions that can cut down your expenses noticeably.
- The most affordable option for eCommerce
- An amazing free plan that includes all the features
- Affordable PRO plan
- Professional looking sites
- Responsive sites
- Great customer support
- They even offer key-turn solutions
- Email responder and other advanced marketing tools included in one place
- No transaction fees
- Minimized payment fees
- Built-in SEO
- Unlimited storage and bandwidth (even on a free plan)
- Not a drag-and-drop builder
- Builder takes some getting used to
Things To Consider Before Creating A Website
Before you rush over to one of the above-presented website builders and start building your new website, make sure to go through the list below. Trust us, it makes sense to take some time to create a clear picture and then take it from there. Below are the most important aspects that should be addressed prior to starting building your website.
Define the purpose of your website
This is super important. Are you plan on using your page to present your business’s basic info? Do you plan to write a blog? Do you want to sell services? Do you want to sell products? Do you want to offer accommodation bookings? Do you want to sell tickets? Do you plan to display photos or video? This and similar questions will help you determine what is your plan for your site.
Note: Perhaps you do not plan on selling anything on your site now, however, as your site grows you may want to have that option.
The type of website you need
The type of website will be partly determined by the purpose of it (covered above). Then, you must decide if you want a single-page site or a multi-page website. Do you want a full-page site or do you want any side widgets? Do you want any elements to be permanently visible on your site even as the visitor scrolls down? Do you want to be able to build sales funnels? All these and many more aspects must be considered.
Find a free website builder online
You can go with one of the free website builders presented herein or use an online searching engine to perform additional research yourself. Keep in mind that some free plans offer you to use your own domain while others only offer you builders subdomain option.
Moreover, not all free plans are suitable for all types of websites. In most cases, free options are not suitable for eCommerce (Comms.dev is a bright exception).
Choosing your domain name
If you are running a serious business, we highly recommend you to go with your own domain. This is a very affordable expense (starting at $5 – $15 per year).
Choosing your web hosting
With your own domain, you also need to find a hosting platform that will host it. Some of the website builders offer their own hosting, while others do not. Do your own homework in this aspect, as it often makes sense to go with a third-party hosting rather than with a builder’s. The hosting company is often professionally engaged in that aspect and will provide greater security.
FAQs
How do I change my website builder?
The difficulty of changing a website builder depends on many factors, including whether they offer you some sort of export option (the one you are leaving behind) and import option (the one you are switching to). It is important to check this as it can save you a lot of time). Worst case scenario, you will need to copy the text manually. If your hosting is with a third party, you will be better off, when switching. If not, make sure to arrange for that as well. It is best to get in touch with both building website platforms to make sure they help you choose the best option.
Can you change your domain name later?
Changing domain names is not possible. However, you can create new domains and transfer the content from one to another.
Can I switch my website host?
Yes, hosting can be changed relatively easily. The process varies from host to host.
Will my website go down during a domain transfer?
If the transfer is done properly, the site doesn’t go down during the domain transfer.
How long does it take to transfer a website?
It depends on the hosting provider. It can take up to 14 days.
Can I move my website from GoDaddy to another host?
Yes. You can move domains from one host to another basically as you please.
Where is the best place to buy a domain name?
There are many reputable places. The most commonly used ones are Domain.com, Bluehost, HostGator, GoDaddy, Namecheap, and many others.
Which website builder is best for SEO?
If you are looking for a website builder that is suitable for SEO beginners, most commonly Wix comes at the top of the list. However, if you want the most advanced options Weebly and Squarespace may be more suitable.
Keep in mind, that most reputable builders have solid SEO tools integrated. It will be your content SEO and marketing that will play a major role in that aspect.